How To Fix 'The Hosted Network Couldn’t Be Started' in Windows

Method 1:

Note : If your Wi-Fi adapter is not listed in the device manager you might need to restart your computer. The below 2 next steps are not really required, what you need to do is to enable your device now.
.

Method 1:
- Open 'Device Manager' and click on 'View' > 'Show Hidden Devices'
- Now navigate to 'Network Adapters' and browse to 'Microsoft Hosted Network Virtual Adapter'
- Right click on it and choose 'Enable'
- Go To Control Panel > Select 'System and Security'
- Then 'System' > 'Device Manager'
OR
- Open Run and type devmgmt.msc and hit enter.
- Now 'Device Manager' window will open.
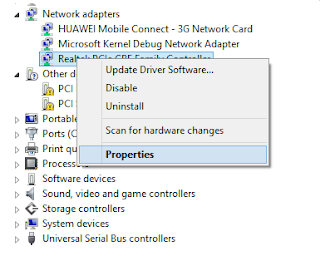
- Select and expand the Network adapters from the list of devices.
- Now Find your wireless network adapter and right-click on it and select 'Properties'

Note : If your Wi-Fi adapter is not listed in the device manager you might need to restart your computer. The below 2 next steps are not really required, what you need to do is to enable your device now.
- Select the 'Power Management' tab.
- Make sure Under the 'Power Management' tab, the following option is checked (enabled):
“Allow the computer to turn off this device to save power”
- If not just Enable it and click ok.
.


Post a Comment