Latest Post


How to Enable the Dark Theme for Windows 10

1. Open up the Registry Editor

Type in the search bar Regedit. Or (Run > Regedit > OK)


Setp 1:

Navigate to

HKEY_LOCAL_MACHINE \ SOFTWARE \ Microsoft \ Windows \ CurrentVersion \ Themes\

Personalize by double clicking each "folder" (key)

  • Create Personalize (key):
    You may not have the sub-key \Personalize
(If not so you can create one; if you already have one then skip this step)


If you are missing the \Personalize key, just right-click on \Themes and select New > Key and Rename it Personalize

Then
  • Create new DWORD (in Personalize folder)
  • Right-click \Personalize and select New > DWORD (32-bit) Value
  • Rename it  "AppsUseLightTheme"


Confirm Its Value:
For its value, it should already be 0 so leave it


Step 2:

Repeat the above but for

HKEY_CURRENT_USER \ SOFTWARE \ Microsoft \ Windows \ CurrentVersion \ Themes \ Personalize.


Once again, create a new AppsUseLightTheme
DWORD (32-bit) Value with a 0 value.

Now, log out of Windows 10 and back in again. Start menu > Select your photo > Choose 'Sign out'


If you ever want to go back to the light theme, simply re-edit the values of the two AppsUseLightTheme DWORDs and change their value from 0 (off) to 1 (on). Then sign out and back in again and you are back to the system default.

Note: This theme only works in Windows 10 system apps.

.

Add Desktop Gadgets to Windows 10

Method 1:

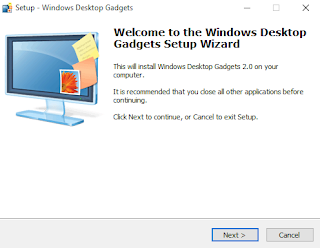
Windows Desktop Gadgets


Windows Desktop Gadgets is a free solution that will help to bring back the Windows 7 desktop gadgets that you loved to modern versions of Windows, including Windows 10.

 >>   Download Windows Desktop Gadgets Installer 

Installation is quick and easy.

  
  Add More Gadgets: click on Get more gadgets online & Download it.


Method 2:

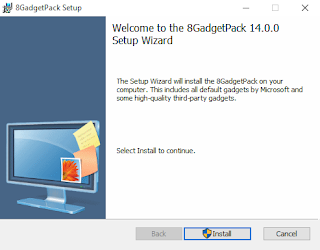
8GadgetPack


Just like the above software, 8GadgetPack is another free application to install gadgets in Windows 10. Although 8GadgetPack was developed for Windows 8/8.1, it’s compatible with Windows 10 as well.

>>  Download 8GadgetPack 

Download and install 8Gadgetpack to see a sidebar containing your favourite desktop gadgets. A total of 45 gadgets are installed when you install 8GadgetPack, including clock, calendar, currency, clipboarder, custom calendar, app launcher, and all CPU meter. This one also adds gadget options to desktop context menu and is very easy to use.


.


Disable Automatic Windows Updates in Windows 10

Method 1:

How to Temporarily Prevent a Windows or
Driver update from Reinstalling in Windows 10


To uninstall the unwanted driver:
  • Launch the Device Manager with a right click on the lower left corner of the desktop and a left click on Device Manager.
  • Located the device driver with the problem driver installed, right click and choose Uninstall.
  • In the uninstall dialog, check the box to Delete the driver software for this device if available.

To uninstall an unwanted Windows Update:
  • Type “View Installed Updates” in the Search box and then click on View Installed Updates – Control Panel from the Search results.
  • To uninstall the unwanted update, select it from the list and then click Uninstall.

To temporarily prevent the driver or update from being reinstalled until a new driver or updated fix is available, a troubleshooter is available that provides a user interface for hiding and showing Windows Updates and drivers for Windows 10. You can obtain and run the "Show or hide updates" troubleshooter by downloading it.

>> Download "Show or hide updates" troubleshooter package 


Method 2:

To Enable or Disable Automatic Updates using Group Policy

1. Open the Local Group Policy Editor. (Run > gpedit.msc > OK)

2. In the left pane of Local Group Policy Editor, navigate to the location below.

Computer Configuration/Administrative Templates/Windows Components/Windows Update

3. In the right pane of  Windows Update  in Local Group Policy Editor, double click on the
Configure Automatic Updates  policy to edit it.


4. Select Disabled at the top, click on OK


5. When finished, close the Local Group Policy Editor.


# To Set Windows Update to Notify before Downloading and Installing any Updates:
  • Select Enabled at the top.
  • Select 2. Notify for download and notify for install in the "Configure automatic updating" drop down menu under Options, click on OK.

# Disable Auto Restart

Method 1:
  • Open the Local Group Policy Editor.
    (Run > gpedit.msc > OK)
  • In the left pane of Local Group Policy Editor, navigate to the location below.

    Computer Configuration/Administrative Templates/Windows Components/Windows Update
  • Double click on the 'No auto-restart with logged on users for scheduled automatic updates installations' 
  • Select Enabled at the top, click on OK

Method 2:
  • Start (Right Click) > Run > Regedit > OK

    HKEY_LOCAL_MACHINE\SOFTWARE\Policies\Microsoft\Windows\WindowsUpdate\AU
  • Right click on AU -> New DWORD value,
  • Rename It  'NoAutoRebootWithLoggedOnUsers'
  • Then double click on it and enter a value of 1 & Close Regedit.   


Method 3:

To Enable or Disable Automatic Updates using a REG file


1. To Set Windows Update to Notify before Downloading and Installing any Updates


2. To Set Windows Update to Never Notify or Check for Updates

3. Save the .reg file to your desktop.

4. Double click/tap on the downloaded .reg file to merge it.

5. Done

# Sometimes it may take a while for it to not automatically download and install updates though.


Method 4:

Stopping the Windows Update Service

Start (Right Click) > Run > services.msc > OK

Windows Update” and double click Stop > OK


Method 5:


  • Open Settings app from Start Menu and go to Setting > Update & security > Windows Update
  • Now click on "Advanced options" link.
  • First select "Notify to schedule restart" option from drop-down box. It'll stop Windows from automatically restart your computer after downloading and installing updates.
     
  • Now uncheck "Give me updates for other Microsoft products when I update Windows" option. It'll block automatic download of a few updates which are related to various Microsoft products.
  • Now enable "Defer upgrades" option. When this option is enabled, new Windows updates will not be downloaded and installed for several days or months. But security updates will be downloaded immediately. Enabling this option will ensure you that all Windows updates will receive enough testing before they get installed in your computer. 
  • Now click on "Choose how updates are delivered" link and set the slider to Off given under "Updates from more than one place". It'll help you in saving your Internet connection bandwidth as this feature works quite similar to P2P or torrents.


# Update Your Windows Updates Manually:

Install Windows Updates:

Start > Settings > Update & security > Windows Update > Click on Check for updates


Also Check:

# Windows 10 Privacy Setting:

 How To Stop Windows 10 From Spying On You 


.

Create a Windows 10 USB Bootable Flash Drive


Method 1:
Create Bootable USB using Rufus


Step 1: Download  the latest version of  Rufus.
Rufus is a portable utility and hence doesn’t require an installation.

Step 2: Connect your 4GB+ USB drive to your PC where you have installed Vista, Windows 7, Windows 8, Windows 8.1 Or Windows 10 Be sure to backup all data from your USB drive.

Step 3: Run Rufus utility.

Step 4: Change All Settings & Then select the disc icon next to the ISO dropdown and navigate to the location of your official Windows 10 ISO.


Step 5: Finally, click Start button, click OK button when you see the warning dialog to continue its job.


Downloads:

 Rufus Tool 


Method 2:
  • Browse to the downloaded ISO in Windows Explorer, right click the file and choose Mount
    OR Open as Windows Explorer
  • Select all files/folders using the mouse or CTRL+A , right click on the highlighted area and choose Copy (or CTRL+C)


  • Open you (empty) USB disk in Explorer and right click the white space and choose Paste (or CTRL+V)

The next thing for you to do is to modify the USB disk for booting. Up until now, it’s still only a non-bootable USB Windows 10 installer.
  • Go back to the command prompt window you shouldn’t have closed
  • Type the following command  -

    k:\boot\bootsect.exe /nt60 g:
    and press return
    (Ensure you replace the k: and g: drive letters with your mounted ISO media and USB disk respectively)
  • Type Exit to close the command prompt window
All that you need to do now is remove the USB media from your computer, plug it into the device you wish to test Windows 10 on, and boot from it.

.

Windows 8 Charms Bar (Side Bar) in Windows 10


Steps:
1. First you'll need to install RocketDock utility for windows.

 Download RocketDock

2. Then Download following skin:

 Download Windows 8 Charms Bar Skin

Then Extract it, you'll get 3 folders:
  • Charmbar transparent
  • Icons
  • Settings

3. Now open RocketDock's folder present in Program Files.
You'll find RocketDock folder in following locations:

    C:\Program Files\RocketDock\ (for 32-bit Windows)
    C:\Program Files (x86)\RocketDock\ (for 64-bit Windows)

4. First copy "Charmbar transparent" folder to "RocketDock\Skins" folder.

5. Now copy "Icons" folder into "RocketDock" folder directly.
The "Icons" folder will already exist in RocketDock folder, replace it.

6. Now "Settings" folder. It contains 2 files "Settings.ini" and "Settingstransparent.ini".
Replace default "Settings.ini" file present in RocketDock's folder with this new one.

7. That's it. Now run RocketDock and get ready to enjoy Windows 8 Charms Bar in Windows 10.


PS: The extra "Settingstransparent.ini" file present in downloaded RAR file can be used to have a transparent background for Charms Bar instead of default black.
Simply rename "Settingstransparent.ini" file to "Settings.ini" and Replace the "Settings.ini" file present in RocketDock folder with this one.

NOTE: If a shortcut in RocketDock doesn't work for you, you can edit its Properties by right-click on the icon and select "Icon Settings" option and then edit the shortcut path mentioned in "Target" text box to the correct path according to your system.

EnJoy :)

.

How to Delete Windows.old Folder in Windows 10


Delete "Windows.old" Folder using Disk Cleanup

1. Press the Windows + R keys to open the Run dialog, type

   cleanmgr
 
   and click/tap on OK to open Disk Cleanup.

2. If you have more than one drive or partition on your PC, then select the Windows C: drive, and click on OK.


3. Click/tap on the Clean up system files button.


4. Repeat step 2 above.

5. Check the Previous Windows installation(s) box, and click on OK.


6. Click/tap on Delete Files to confirm.


7. When Disk Cleanup finishes, the C:\Windows.old folder will be deleted.


# Also Delete SoftwareDistribution Folder:
Navigate to C:\Windows\SoftwareDistribution\Download and delete whatever is inside this folder.


Note:
  • Be sure to copy any files that you may want out of the Windows.old folder before you delete it.
    Once deleted, they are gone.
  • If you delete the Windows.old folder, you will no longer be able to go back to a previous version of Windows.
  • You must be an administrator to be able to do the steps in this tutorial.

Author Name

{picture#https://instagram.fbom1-2.fna.fbcdn.net/t51.2885-19/s150x150/17662158_221658868312088_138323287238246400_a.jpg} Hi, I am Swapnil Zambare. I love to explore Computer and Internet. My aim is to spread tips and tricks related to Hacking, Computer, Android phones, Blogging, SEO, Social networks and many mores all over the world for free so that every one can enjoy our Premium Services for Completely Free. {facebook#https://www.facebook.com/SwapnilTech} {twitter#https://twitter.com/swapnilzambare7} {google#YOUR_SOCIAL_PROFILE_URL} {pinterest#YOUR_SOCIAL_PROFILE_URL} {youtube#YOUR_SOCIAL_PROFILE_URL} {instagram#https://www.instagram.com/theswapnilzambare/}

Contact Form

Name

Email *

Message *

Powered by Blogger.