Latest Post


Lock PC Temporarily When Someone Enter
Wrong Password in:

> click on "Start" button

> Type "Local Security Policy" in search program and files box.

> Now click on"Local Secruity Policy"


> From left window pane expand "Account Policies"


> Then double click on "Account Lockout Policy"


> After that Double click on "Account Lockout threshold"


> Now a new window will appear


> In That window give the "Value" after how many invalid

> Password login attempts you want to lock your pc

> Now click apply


> Another window will appear click "Ok"


> Process Completed

Remove Posts (Atom) From Blogspot:

> Sign in Blogspot
> Go to Dashboard > Template > Edit HTML


Find In html  (Ctrl + F)

    <b:if cond='data:blog.pageType != "item"'> <!-- Blog feed links -->
    <b:if cond='data:feedLinks'>
    <div class='blog-feeds'>
    <b:include data='feedLinks' name='feedLinksBody'/>
    </div>
    </b:if>


Remove this Line:

    <b:include data='feedLinks' name='feedLinksBody'/>

Save It

Now check blog  Posts (Atom) Removed

Enjoy.... :D

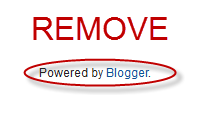
Remove Powered by Blogger:


1. Go to Blogger Dashboard. Click on  Layout.

   Click on the Page Elements tab for your Blog.


2. Click on Edit HTML and select the Expand Widget Templates checkbox.

3. Find This Code:

<b:widget id='Attribution1' locked='true' title='' type='Attribution'>
<b:includable id='main'>
    <b:if cond='data:feedbackSurveyLink'>
      <div class='mobile-survey-link' style='text-align: center;'>
        <data:feedbackSurveyLink/>
      </div>
    </b:if>

    <div class='widget-content' style='text-align: center;'>
      <b:if cond='data:attribution != &quot;&quot;'>
       <data:attribution/>
      </b:if>
    </div>

    <b:include name='quickedit'/>
  </b:includable>
</b:widget>


>>>  Delete This Code


OR 

 Copy Code line Here


4. A warning is displayed. Click on Delete Widgets and click on Save Template Button.

5. Save the template


# Removed "Powered by Blogger" from your Blogger

TRY this....

MAGIC #1

Found that nobody can create a FOLDER anywhere on the Computer which can be named as "CON". This is something funny and inexplicable? At Microsoft the whole Team, couldn't answer why this happened! TRY IT NOW, IT WILL NOT CREATE A "CON" FOLDER

MAGIC #2

For those of you using Windows, do the following:
1.) Open an empty notepad file
2.) Type "Bush hid the facts" (without the quotes)
3.) Save it as whatever you want.
4.) Close it, and re-open it.
Noticed the weird bug? No one can explain!

MAGIC #3

Again this is something funny and can't be explained?
At Microsoft the whole Team, including Bill Gates, couldn't answer why this happened!
It was discovered by a Brazilian. Try it out yourself?
Open Microsoft Word and type
=rand (200, 99)
And then press ENTER And see the magic?..!

Magic #4

Did you know that a flight number from one of the planes that hit one of the two WTC towers on 9/11 was Q33N. In Notepad / WordPad or MS Word, type that flight number i.e Q33N. Increase the font size to 72. Change the font to Wingdings. ....

Many a time, it becomes necessary for us to write protect our USB flash drive so as to protect it from viruses and other malware programs.
Because flash drives are so popular and most widely used to move data between computers, they are the prime target for attackers as a means to get infections spread around the computer world. Also, since USB drive is not a Read-Only Memory (ROM), the data inside it can easily be modified or deleted by malware programs.
But unfortunately, most of the new flash drives do not come with a write-protect feature as the manufacturers wish to cut down the cost of production. Hence, the only way to write-protect your USB flash drives is to enable this feature on your own computer.

This can be done by adding a small entry to the Windows registry which acts as a switch that can be enabled to make use of the write protection or disabled to allow write access. Just follow these steps:

1. Open the Registry Editor (Open the “Run” dialog box, type regedit and hit “Enter”).

2.Navigate to the following Registry key:
HKEY_LOCAL_MACHINE\SYSTEM\CurrentControlSet\Control\

3. Create a New Key named as StorageDevicePolicies. To do this right-click on Control, and click on New->Key and name it as StorageDevicePolicies.

4. Now right-click on  StorageDevicePolicies and create a New->DWORD (32-bit) Value and name it as WriteProtect.

5. Double-click on WriteProtect and set the Value data to 1.

> Now the right-protection for USB drives is enabled on your computer (no restart required) and thus it would not be possible for anyone or any program to add/delete the contents from your USB flash drive. Any attempt to copy or download the files onto the USB drive will result in the following error message being displayed.

> To revert and remove the write-protection, all you need to do is just change the Value data for WriteProtect (Step-5) from 1 back to 0. Now write access to all the USB devices is re-enabled...

.

Author Name

{picture#https://instagram.fbom1-2.fna.fbcdn.net/t51.2885-19/s150x150/17662158_221658868312088_138323287238246400_a.jpg} Hi, I am Swapnil Zambare. I love to explore Computer and Internet. My aim is to spread tips and tricks related to Hacking, Computer, Android phones, Blogging, SEO, Social networks and many mores all over the world for free so that every one can enjoy our Premium Services for Completely Free. {facebook#https://www.facebook.com/SwapnilTech} {twitter#https://twitter.com/swapnilzambare7} {google#YOUR_SOCIAL_PROFILE_URL} {pinterest#YOUR_SOCIAL_PROFILE_URL} {youtube#YOUR_SOCIAL_PROFILE_URL} {instagram#https://www.instagram.com/theswapnilzambare/}

Contact Form

Name

Email *

Message *

Powered by Blogger.